To Send Email

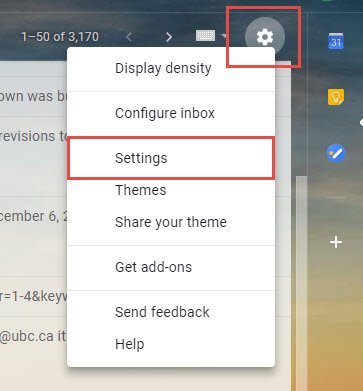
- Go to Gmail Settings and click the Accounts and Import tab.
- Under Send mail as section, click the link Add another email address.
- In the pop-up box that appears, enter the Name and the Email address you created.
- In the following screen, enter the SMTP Server/Outgoing Server, Port, Username and the password.
- Click on Add Account and when you see the screen asking to “Confirm verification and add your email address..”, just close that box. Go to your inbox, you will soon receive an email with a verification link, click on that link to verify and you will be able to send emails from the newly connected email address.

Note: Check your cPanel’s Mail Configuration to find the correct username, servers and ports. Usernames are usually the email address itself.
To Receive Email
- Go to Gmail Settings, Click the Accounts & Import tab.
- Scroll to Check mail from other accounts section and click Add a mail account.
- In the pop-up box that appears, enter the Email Address you created and click Next.
- Make sure “
- In the following screen, enter the Mail Configuration information your cPanel provided, in most cases, the username is the email address itself, name@domainname.com and the password is the same password you entered while creating the email address in the cPanel. Also, enter the POP server and Ports for the incoming server.
- Check the “Leave a copy of retrieved message on the server” option and click ‘Add Account’.
Once the above tasks are done you should be able to receive and send emails with the cPanel created email address using Gmail.
