Properly Uninstalling a WordPress installation is not something that everyone prioritizes. Abandoning a WordPress installation is not recommended for several reasons, the main being security. This article shows how to properly uninstall a WordPress installation using Softaculous WordPress manager.
Backup Up your Website
As always, taking a backup of your WordPress installation including the database is Step zero. If you are unsure how to back up a WordPress site, please our Backup category archive which includes several methods to backup a WordPress website.
How to backup a WordPress website?
Uninstall a WordPress installation using Softaculous WordPress manager
Step #1: Log in to your web hosting provider’s cPanel or other web hosting control panels like Plesk or DirectAdmin.
Step #2: Search for Softaculous
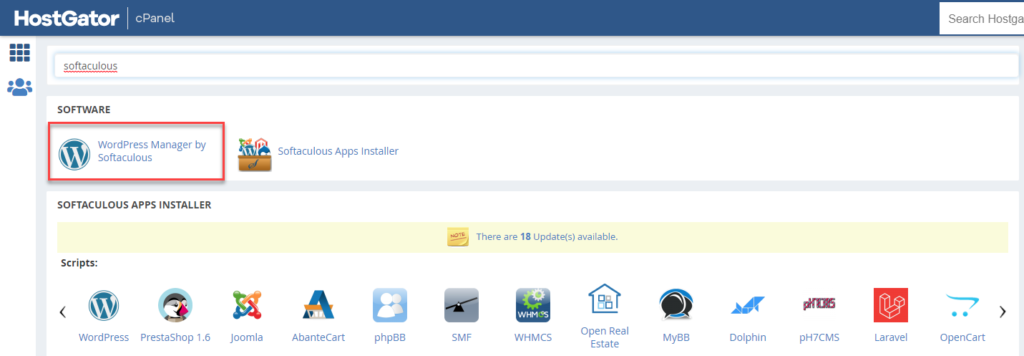
Step #3: Click to open the WordPress Manager by Softaculous
Step #4: The following Softaculous screen should list all the WordPress installations in your hosting account, if not, click the Scan button and the tool will scan the hosting account for WordPress sites.
Step #5: Find the installation that you’d like to uninstall and click on the down arrow on the right.
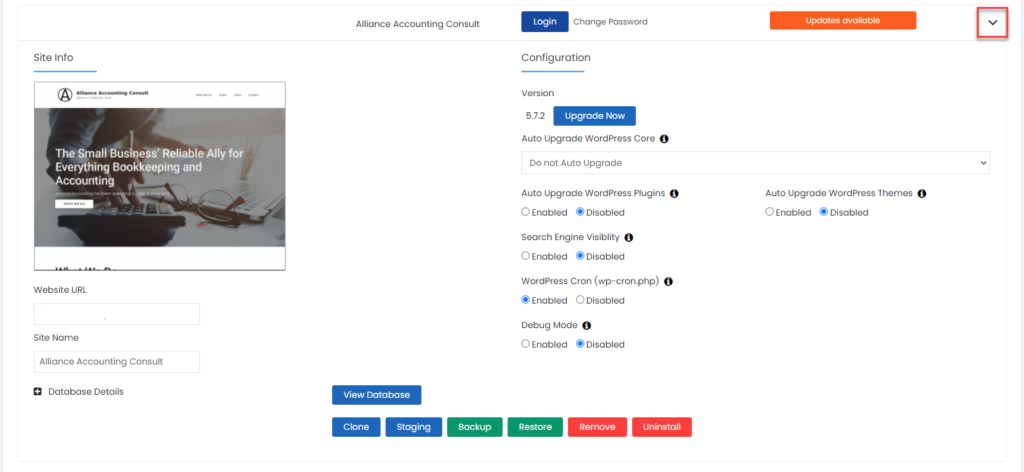
Step #6: The tool will now show a summary of the Installation and will have quick actions such as clone, restore, remove, uninstall, etc
The ‘Remove’ option will not remove the WordPress instance, instead, it just removes the site from the Softaculous listing. Click on the ‘Uninstall’ button to remove the WordPress installation including the files, folders and the database.
Step #7: Next, you will be prompted to confirm the choices, click on the ‘Remove Installation’ button to proceed with uninstall.

Step #8: Confirm the next prompt as well, and in a few seconds you should see the message ‘The installation was removed successfully”

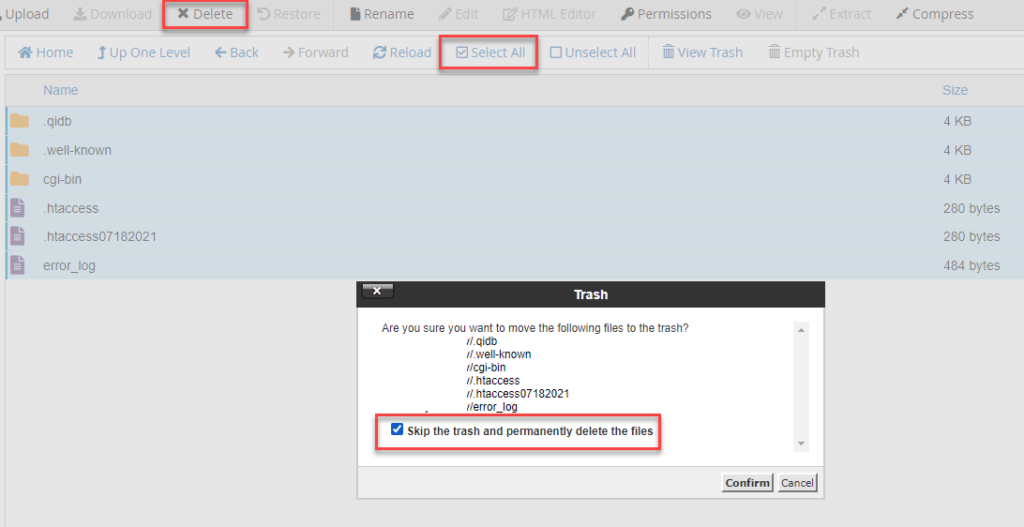
Step #9: The uninstall tool would remove all WordPress files and folders, however, the sub-domain/domain root directory could still contain some files like the .htaccess, error_log, etc and a few metadata folders like .well-known.
To remove these files, navigate to the File Manager -> sub-domain/domain directory root -> Select All -> Delete -> Check the ‘Skip the trash and permanently delete the files‘ option -> Confirm.
Your WordPress installation has been uninstalled successfully. Optionally, if you are using a sub-domain or an addon domain, and no longer has a use for it, then we recommend removing the sub from your cPanel.